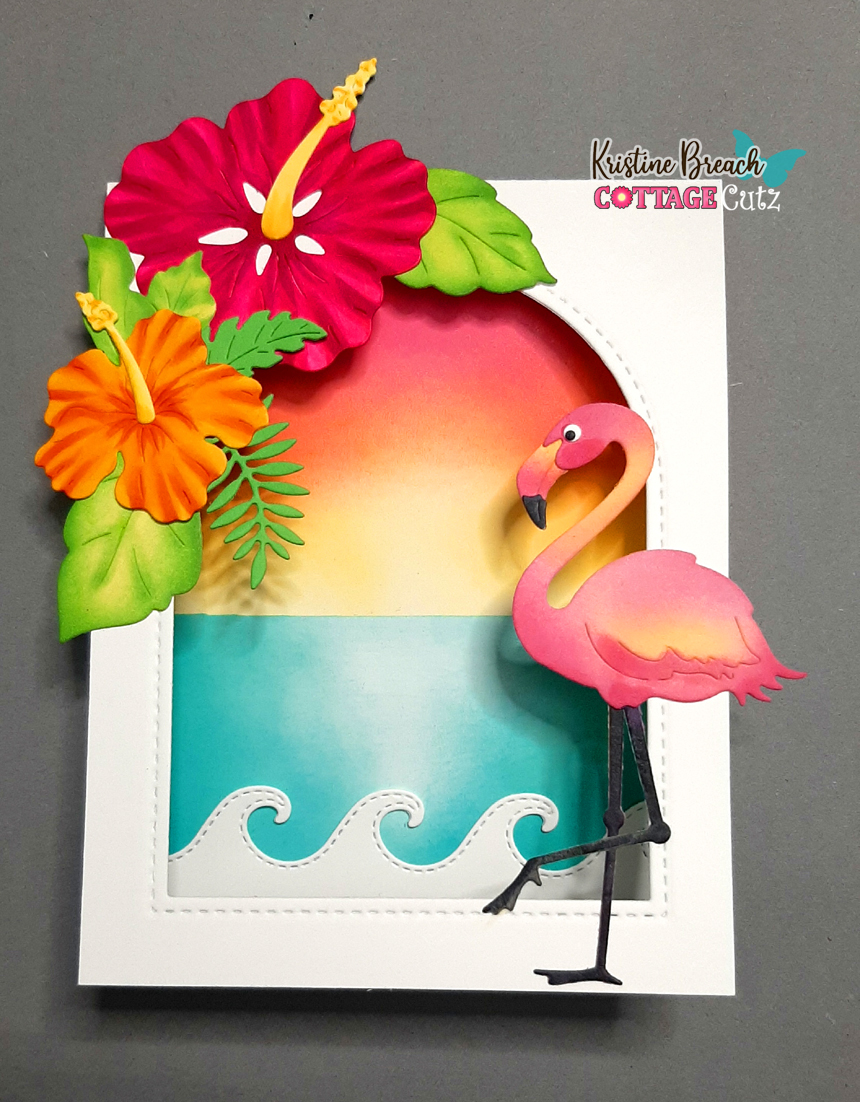
Aloha & happy Friday friends!
Flamingos seem to be the "in" thing in the cardmaking world at the moment, so today I've gone beachy with this simple die cut window card with an ink blended sunset inside, featuring the Flamingo w/ Hibiscus die, Hibiscus Flowers, and just the fern from the Tropical Fruit die.
1. Start with an A2 top folding card base (4-1/4" x 5-1/2") and die cut a window out of the front of card (can be any shape you want). I used the Double Stitched Arches die set from La-La Land Crafts.
2. On the inside, use light tack tape like Post-it tape to mask off a line to separate the water from the sky. Not shown in photo below, but you will also want to mask off the top part just above the score line.
3. Using Distress Oxide inks and blending brushes (or other blending tool), lightly ink Squeezed Lemonade from the sides inward, leaving a li'l bit of white in center for light. Next, Add Picked Raspberry from the top down, blending into yellow.
4. Remove Post-It tape and move it to cover the bottom of yellow. Then add blue ink from sides inward, again leaving a lil bit of white for the reflection as shown below.
5. *OPTIONAL: I die cut the Waves Slimline die to cover up a boo-boo (I accidentally touched the bottom part with a picked raspberry finger!) but I like the detail the waves border added!
6. Die cut your Flamingo w/ Hibiscus, Hibiscus Flowers, and just the fern from the Tropical Fruit die and color. I used Copics for the flowers and Distress Oxide inks for the flamingo and leaves.
7. Before gluing die cut pieces to the front, you may want to insert a piece of paper (I used a waxy sheet) inside so you don't accidentally get glue on your ink blended background!
As you can see, I hung my elements off my card. This will fit into a 5x7" envelope.
8. And lastly, I stamped and embossed a simple "Hello" onto black c.s. and cut a fishtail with scissors. I then added some white gel pen stitch marks to it, and some dotty highlights on my pink flower. That's it! Voila!
♡ ♡ ♡
Ink Something Crafty!


