
Happy Monday friends!
I'm excited to share this cute Sock Hop fun fold card today and I even have a tutorial for you! I saw a few versions of this fun fold on Pinterest and they called it a Double Box Gatefold card, however I am really not sure I would call this a Gatefold card. It is sort of a mash up of the Bridge Fold and the Double Z-Fold Box Card (or Surprise Box Card) that I've made quite a few of, except this one has 2 boxes and one overlaps the other when folded. So I am calling this the Double Pop Up Box Card. I came up with my own dimensions for this, so I'm sharing with you today how this came together!
Here's just a quick video clip of the card - you can click on the box in bottom right corner to make it full screen.
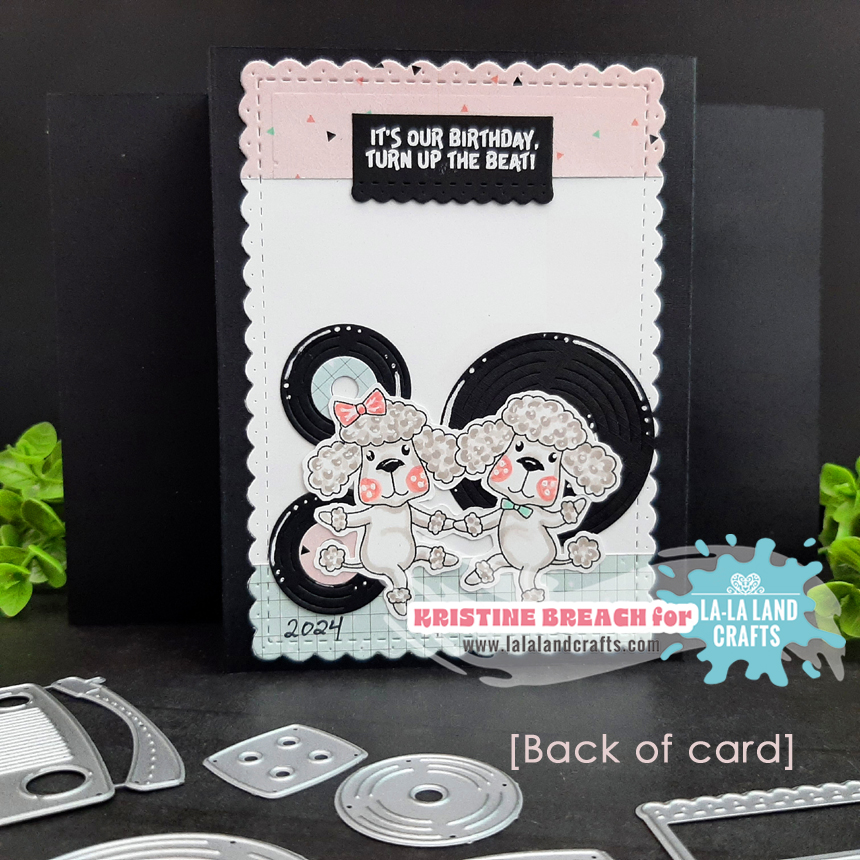
My card features the NEW Sock Hop Luka and Sock Hop Marci stamps and more from the March Release at La-La Land Crafts! I also colored up the cute dancing poodles from the Good Times stamp set, but didn't like the placement as they covered up the record player, so I've added them to the back of my card! (see next photo)
PRODUCTS:
~NOTES~
• I made this to fit into an A2 size envelope - folded size is 4-1/4" x 5-1/2"
• To help minimize bulk, I used 65 lb. cardstock
HOW I MADE IT:
1. I cut my black card base at 10-3/4" x 5-1/2" and with long edge across top, I scored at 1-5/8", 3-1/4", 7-1/2", and 9-1/8"
• Fold & burnish the outer score lines as mountain folds and the 2 inner scores as valley folds.

• Fold & burnish the 2 outer scores as mountain folds and the 2 inner folds as valley folds as shown below.

• Fold and burnish opposite ways as shown - it supposedly helps to collapse better ☺

Now it's time to cut patterned paper and decorate BEFORE you add your bridge strips.
~NOTES~
• For the center (black/white) piece I used a paper from the Love You More Paper Pack. For all else, I used the Celebrate Paper Pack.
• To minimize bulk, I did not cut full strips of patterned papers on the parts where the strips will be attached.
• I like to cut layering panels down by 1/16" from the normal 1/4" -- I just like the look of the amount of border by doing this. If it bugs you, feel free to round up or down to the closest 1/4" etc. ☺
CUTTING LAYERING PANELS:
4. Cut (1) B/W Center Panel at 4-1/16" x 5-5/16" - adhere to center
5. Cut (2) Inner Pink/Polka Dot Panels at 4-1/16" x 1-7/16" -- For the left one, align the top with the top of the b/w center panel. It will be short on bottom as that is where the strip will go. Again, this was to minimize bulk. For the right one, align with the bottom of the b/w panel.
6. Cut (2) Front Striped Panels at 2-15/16" x 1-7/16" - To find the placement of front panels, place (but do not adhere) one of the black strips and adhere striped panel just above, leaving about a 1/16" space. Repeat for other front panel.

7. Cut (2 pieces - one of each design) - at 4-1/16" x 1-1/16"
8. Cut (8 pieces - four of each design) - at 1-7/16" x 1-1/16"
• adhere to strips, then attach one strip on top and one on bottom of card as shown below.
9. Add glue to each end flap of the shelf/shelves and insert into lower box as shown.

We're done creating the card base and now we just need to add our stamped images and die cuts!
This card folds flat-ish to fit into an A2 envelope.
• Fold the right side in first, then fold the left in, overlapping the right.

COLORING:
I used the following Copic Markers for Luka:
Skin: E00, 000, 0000, 21, 13; R00
Eyes: BG45 + white gel pen & Pigma Micron 05
Hair: E51, 53, 55, 57
Shirt/Socks: BG10; G00
Tie: R20, 21
Greys: W3, 5, 7, Blk00

I used the following Copic Markers for Marci:
Skin: E00, 000, 0000, 21, 13; R00
Eyes: BG45 + white gel pen & Pigma Micron 05
Lips: R20
Hair: E51, 53, 55, 57
Skirt/Socks: R20, 21, 22; Blk 00 + white gel pen
Shoes: W7; E53 + white gel pen

Because this style of card could get bulky, I opted to glue my images (where they touch the outer panels) instead of popping them up, as I normally would do.

Here is the Retro Turntable. I die cut 2 of them and layered the black behind the coral, and I cut the buttons and needle head from iridescent cardstock. I attached this to the center panel with foam tape.

I also die cut the records and dice and glued those on ☺
For the sentiment, I added an iridescent mat behind it, then I glued it to the top of the shelf in the lower box.
BACK OF CARD:
PRODUCTS:
Retro Marci Rubber Stamps (sentiment)
I hope you enjoyed this tutorial! Thanks so much for looking!

Enjoy 20% off with coupon code EASTER2024
Shop now at www.lalalandcrafts.com 🐰
*valid March 31st through April 5th
*coupon code must be entered to receive a discount
*not valid on previous orders
*not valid on March 2024 release
*not valid on Limited Edition Spring Box
*not valid on Bundles, Kit-of-the Month and Subscriptions
*not valid on classes/events Hop on over to the La-La Land Crafts BLOG or our FB Fan Group for more inspiration!
*An asterisk after an LLLC product means it was previously released as part of a Club Kit
Affiliate links may be used at no additional cost to you.
♡ ♡ ♡
Ink Something Crafty!