Hey there crafty peeps!


7) Fold your card in half and then fold that front (patterned paper) piece back on itself.


16) Using my pencil line as a guide, I glued down the right edges of my sentiment first to make sure I didn't go beyond that pencil line! Then worked backwards, gluing in the rest.
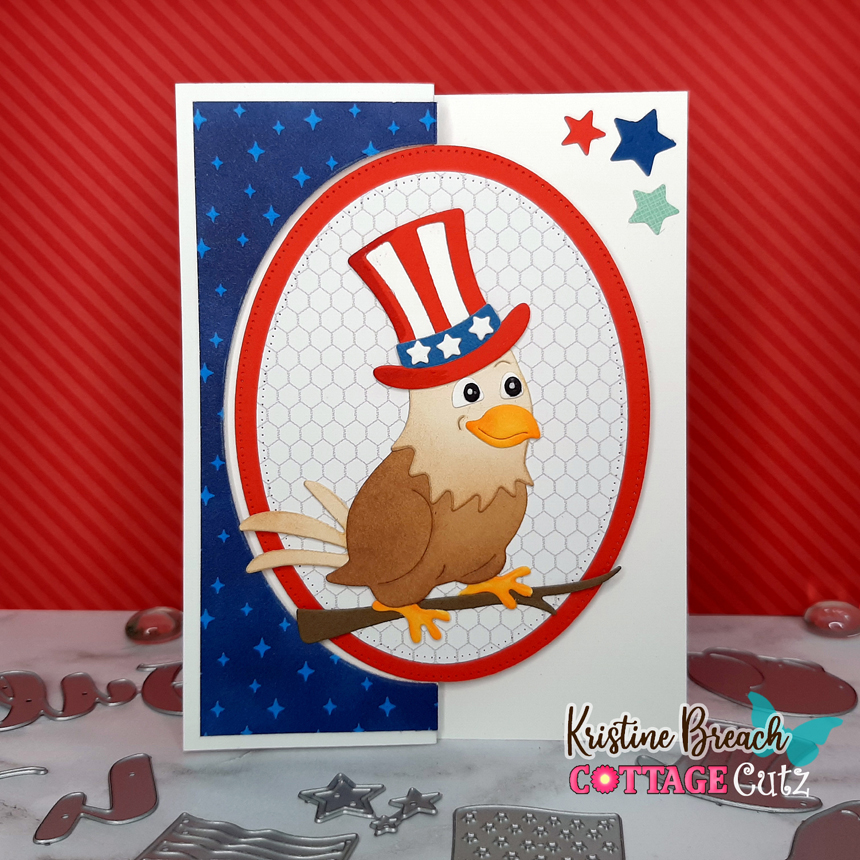
Today's card is an easy Flip Fold Card featuring the cute Patriotic Eagle w/ Top Hat and more from our Patriotic Release! How CUTE is this li'l guy?!!! Such a fun die set and perfect for celebrating our Independence Day.


My friend Mary Marsh is hosting this week's color challenge at Splitcoast Stampers with the following colors:
Real Red
White
Blueberry Bushel
White
Blueberry Bushel
Design Steps:
1) Start with a side folding A2 card (8-1/2" x 5-1/2"- scored the 8-1/2" side at 4-1/4")
2) Cut 2 strips of [star-like] patterned paper: one is cut a 5-1/4" x 2", and the other at 5-1/4" x 1-7/8"

3) Attach the 5-1/4" x 2" piece to the left side of card so that there's 1/8" white border around the top, left and bottom edges. (see below)
4) Take the largest of the Pierced Ovals set and line it up so that the middle of the oval is exactly on the right edge of your patterned paper and centered top to bottom as shown. Tape with light tac tape.

5) Put it on your cutting platform/plate and line up the TOP plate with the right edge of your patterned paper. Be sure not to go over as we only want to cut half of the oval. You may need to hold it there while cranking it thru until it grasps it tightly.

6) Score from the top and bottom JUST TO WHERE THE OVAL STARTS TO CUT along that right edge of patterned paper. Here's a look at the backside as it's easier to see...

8) This step is optional, but I found it REALLY helped to lightly draw a pencil line around the right half of my oval onto my inside layer so that I don't have die cuts (or writing) showing from the front of card when it's closed.

10) With the 2nd largest Pierced Ovals set , cut a patterned paper oval. Attach to center of larger solid red oval.

11) Die cut Patriotic Eagle w/ Top Hat, USA Flag, and Statue of Liberty, assemble and attach to ovals as shown below...

12) Attach oval w/ eagle to FRONT of card, lining up the right edge of ovals.

13) Attach the 5-1/4" x 1-7/8" star strip in the section to the right of your patterned paper that's already attached, centering it between the score lines as shown below.
14) Attach your Liberty Flag oval to the oval that's there, lining up the left edges.

15) Die cut the Happy 4th of July Phrase and stars from same set. I did add in some of the stars from the Firecrackers set because I really like the open stars ☺

***TIP: Before you go crazy with the stars, it helps to close the front of your card every now and then so you can see what will show when the card is closed!


DONE!

Because of that tip I shared, only the 3 stars in upper right corner show from the front when it's in closed position! The rest is a surprise when they open the card ☺


Wishing you all a blessed and safe holiday!!
- Kristine