Merry Christmas!
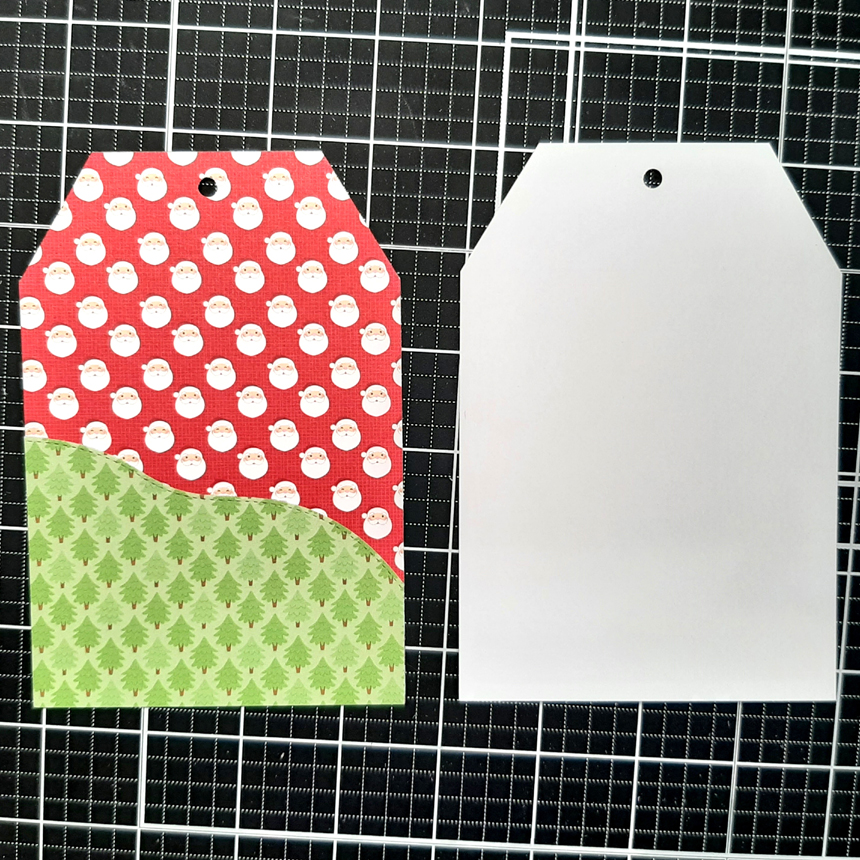

11. Carefully place your WHITE TAG on top, lining up edges and the hole at top.

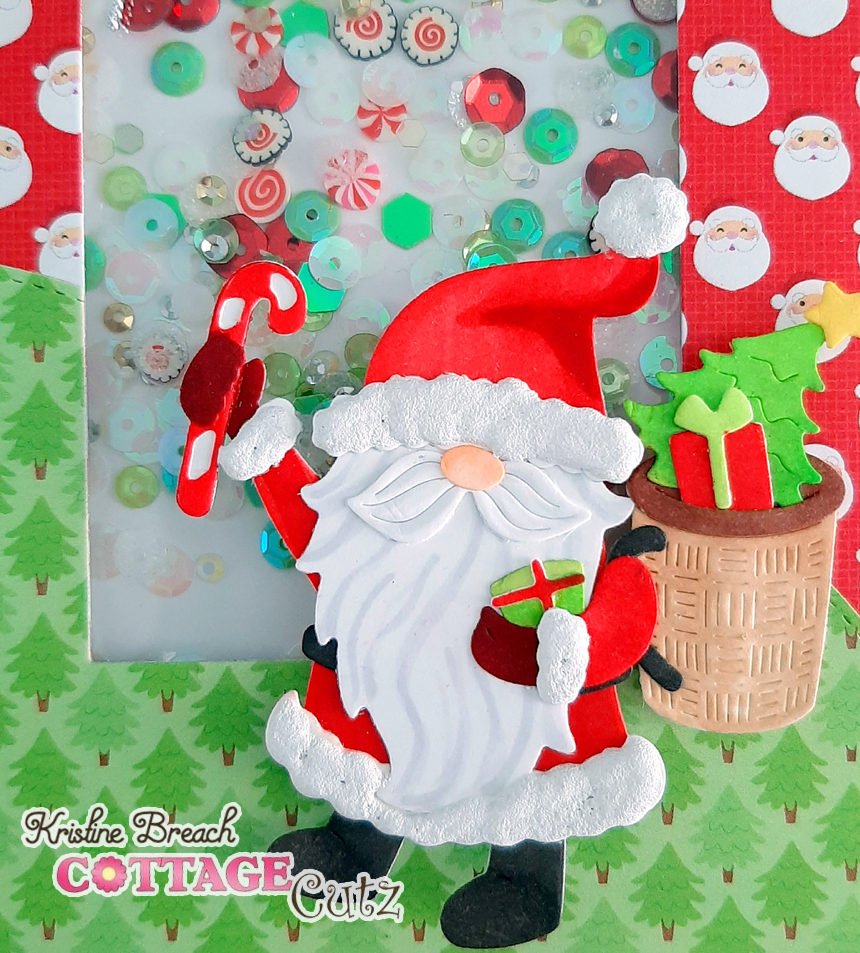
12. Color your Jolly Santa Gnome and attach to tag front using foam tape for dimension.


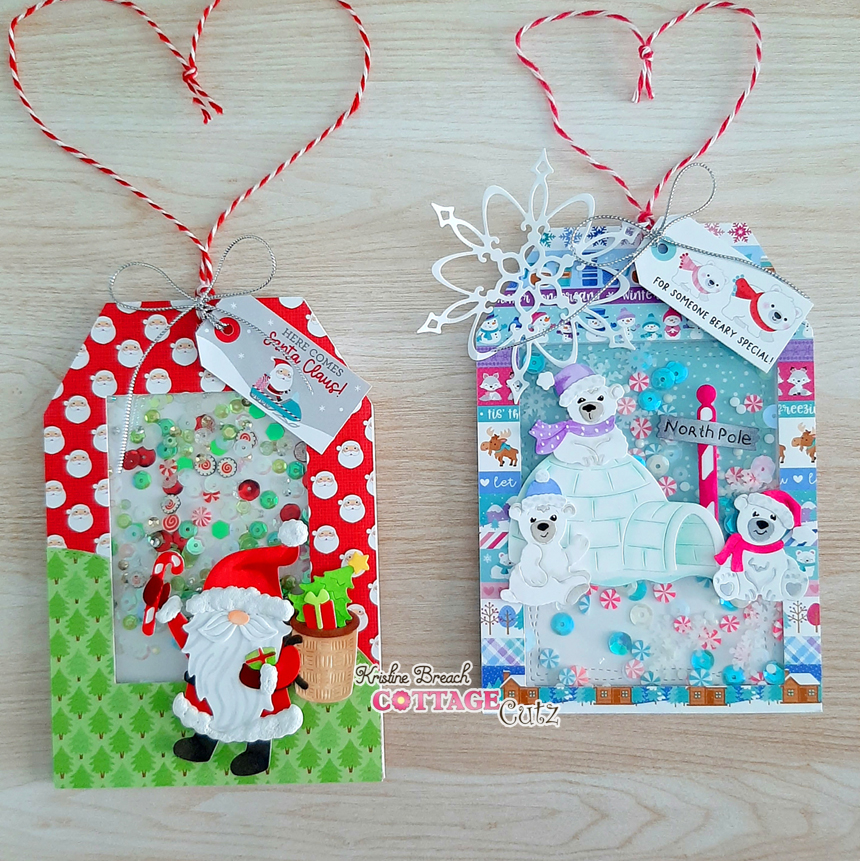
Today I'm on the CottageCutz Blog sharing a couple of Christmas tags that I made and wanted to share. I realize most of you are done making Christmas projects now, so maybe you want to save this idea for next year's gifts... OR you can always change the theme and use these for gift bag tags (thinking Valentine's... Birthdays...any special occasion!) ☺
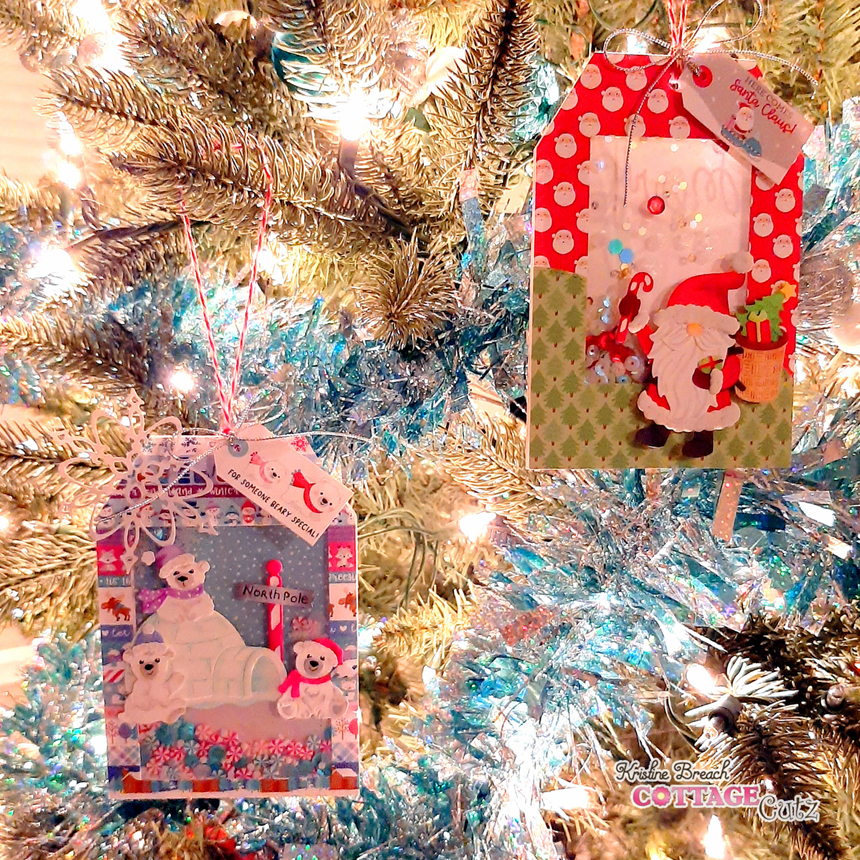
I'm a huge fan of shakers, so I made 2 ornaments that are shaker tags with gift card holders on the back, using the Jolly Santa Gnome from the Christmas 1 Release & I made the other with the Polar Bear Trio with Igloo from the Christmas 2 Release.

• The patterned papers and tiny tags are from Winter Wonderland (Polar Bears Tag) and Let it Snow (Jolly Santa Gnome) from Doodlebug Designs.
JOLLY SANTA GNOME TAG
White Cardstock:
• cut 5-1/2" x 3-3/4"
• die cut Jolly Santa Gnome
Red Cardstock (back of tag):
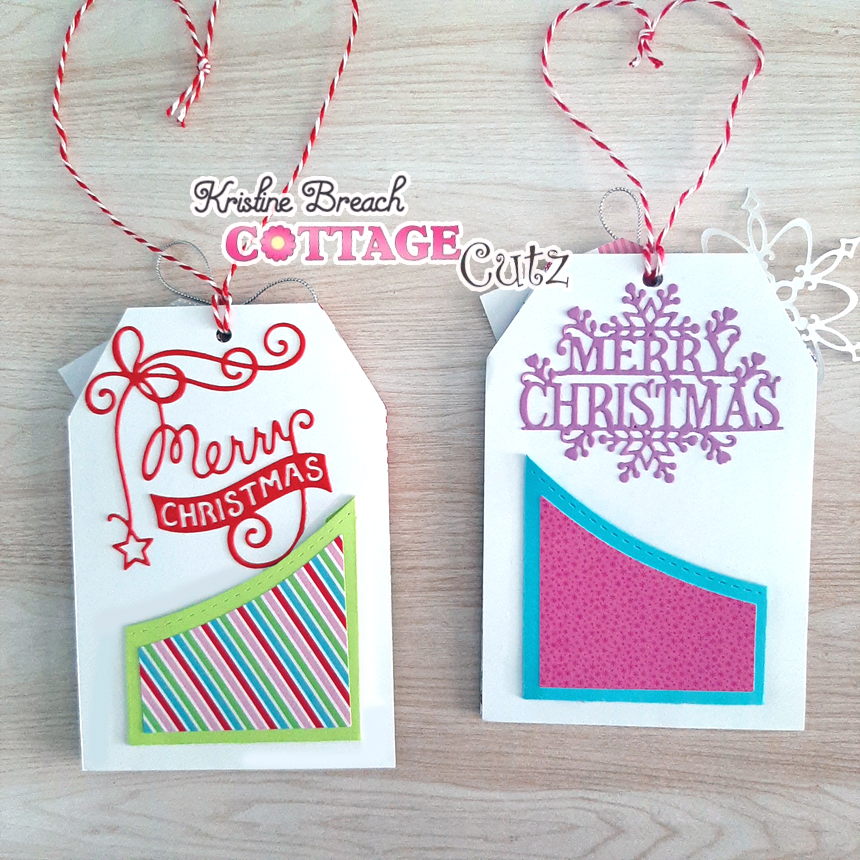
• die cut Merry Christmas Ribbon
Acetate/Window Sheet:
• 3-1/2" x 4-1/4"
Patterned Paper #1 (red with Santas):
• 5-1/2" x 3-3/4"
Patterned paper #2 (green trees):
• 3-3/4" x 3" - then cut the top with a Hills Slimline die
Patterned Paper (tiny tags):
• cut apart one of the tiny tags and punch hole where indicated
HOW TO:
1. Glue patterned paper #2 to the bottom of patterned paper #1.
2. Measure along the TOP of the patterned paper #1 and make pencil marks at 3/4", 1-7/8" and 3"
3. From the TOP, measure down each SIDE and place a mark at 1-1/4"
4. Make a diagonal cut from the TOP 3/4" marks down to the 1-1/4" SIDE marks.
5. Punch a hole about 1/2" down from the center (your 1-7/8" mark)
6. Place that tag over your white piece and use as a guide to cut the corners off of white tag and punch hole in middle.
7. Using a rectangle die, (I used the 3rd largest of the Nested Wacky Stitched Rectangles) center it over your Patterned Paper tag and cut.
8. Turn that tag onto back side and place Scor Tape (or other strong double sided adhesive) close to the rectangle cut-out. Attach your window sheet.
9. Add foam strips/tape just outside the rectangle and around edges of tag. (See photo below)
10. Add sequins/shaker elements.


*Optional: Add Snow Writer (puffy snow, etc) to the trim on his hat & coat!

13. Glue the red Merry Christmas Ribbon to back of tag.
*Optional: Add a pocket to the back for a gift card! (I used the Left and Right Pocket dies from La-La Land Crafts)

POLAR BEAR TRIO WITH IGLOO TAG
Same cutting measurements as the Santa tag with the following exceptions:
• the 2nd patterned paper I glued to the top of the white tag (inside shaker, instead of the front & cut the bottom with the hills die)
• I used the 2nd largest Nested Wacky Stitched Rectangle (larger than the one on Santa shaker)
• I die cut a large snowflake from the Snowflake Set
• I die cut Merry Christmas w/ Snowflakes (for back of tag) from purple cardstock

How CUTE are these?!! ♥ these adorable CottageCutz dies!

PRODUCTS USED:
Merry Christmas to you all, and wishing you all the crafty goodness in 2023!
~Kristine