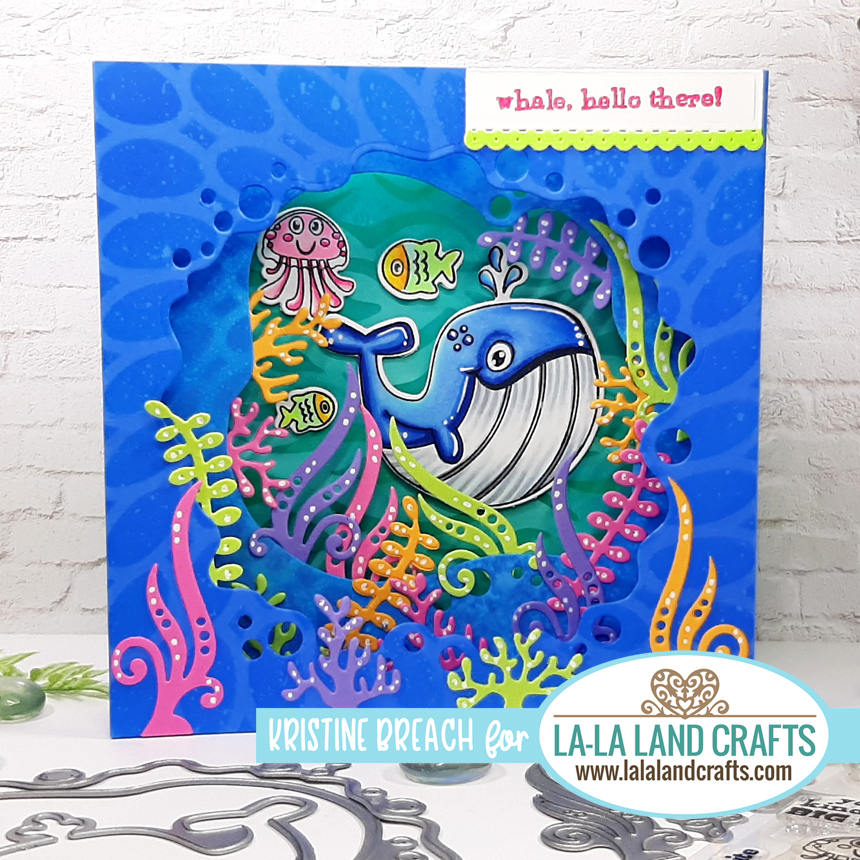
Hello and happy Friday! This week our design team is working with the theme: FISHING!
I've created a diorama box card using the Hey Chum Clear Stamp Set and Sea Critters Outline Dies from La-La Land Crafts ~ and I'm going to share how I made it ☺


CUTTING & SCORING:
Ballet Blue Cardstock:
- Cut to 5-1/2" x 8-1/2" and scored it at 1/2", 1-1/2", 7", and 8"
Turqoise Cardstock:
- Cut to 5-1/2" x 6-1/2" and scored along the 6-1/2" side at 1/2" and 6"
Coastal Cabana Cardstock:
- Cut to 5-1/2" square
White Cardstock:
- I stamped & colored the whale, jellyfish and fish and die cut with the Sea Critters Outlines Die
Various Colors of Cardstock (pinks, orange, lime green, purple):
- I die cut my Seaweed and added white gel pen dots for highlights
DESIGN STEPS:
- With the Carnival Stencil, I added Ballet Blue ink and a li'l bit of Salty Ocean Distress Oxide Ink to my Ballet Blue & Turquoise cardstock pieces, then misted with water and set aside to dry.
- With the waves stencil from the Summer is Here Layering Stencil set, I added Peacock Feathers Distress Oxide ink to my Coastal Cabana Cardstock (5-1/2" square), then misted with water and set aside to dry.
- Using the largest die from Under the Sea die set, I cut the middle out of the Ballet Blue stenciled piece.
- Using the 2nd largest die from Under the Sea die set, I cut the middle out of the Turquoise piece.

- I added Score Tape to both of the flaps on the backside of Turquoise piece.

- Working on the BACKSIDE of the Ballet Blue layer, I attached the left side of the Turquoise layer so that the edge of flap bumps up (just to the left) to the inner score line of the Ballet Blue layer as shown below.


- To attach the right side, I like lift up the left side so I can see through the opening and make sure that the right edge is bumped up to the inner score line of the Ballet Blue as shown below. You don't want to go over the score line, but just up to the right side of it.

- You can now shift the card to the right and left and make sure it will fold flat to fit into an envelope.

- To attach the last piece (5-1/2" square) you can either attach to the very back so the last of the blue flaps are inside (what I did) ... OR you can attach it so the flaps are on the very back of card, totally up to you!
- Last but the most fun part... DECORATE your box!
Hop on over to the La-La Land Crafts BLOG or our FB Fan Group for more inspiration!
Happy Inking!
♥ ♥ ♥
*Affiliate links may be used at no additional cost to you.