Happy Monday, crafty friends!
This is a super easy-to-make "Inside Pop Up Card" featuring dies from CottageCutz new Halloween Release!
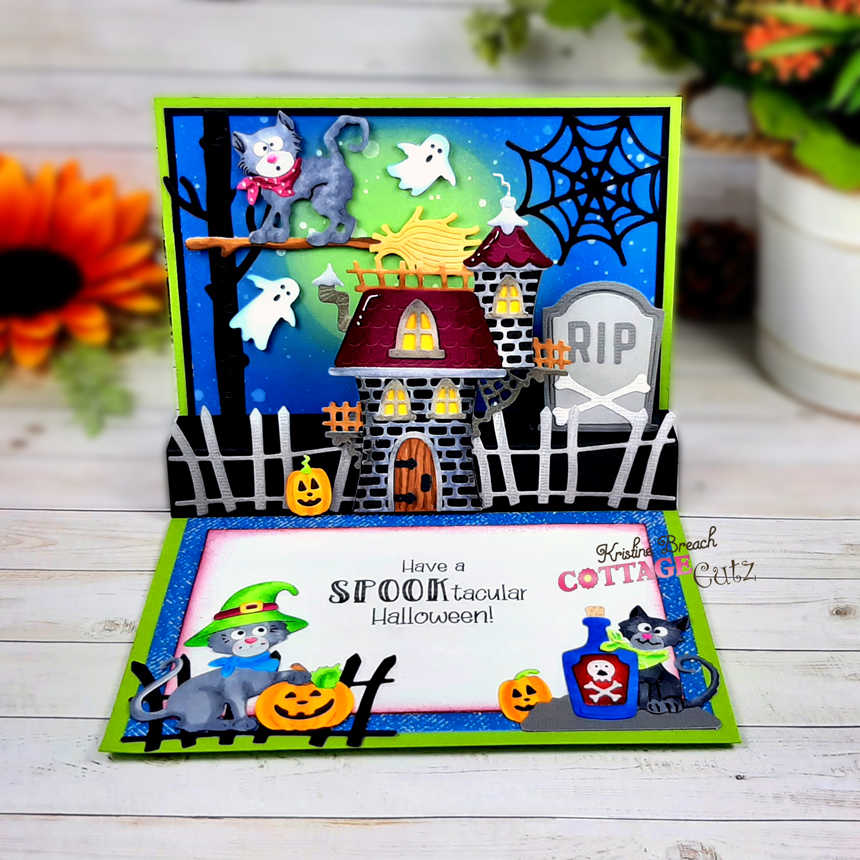
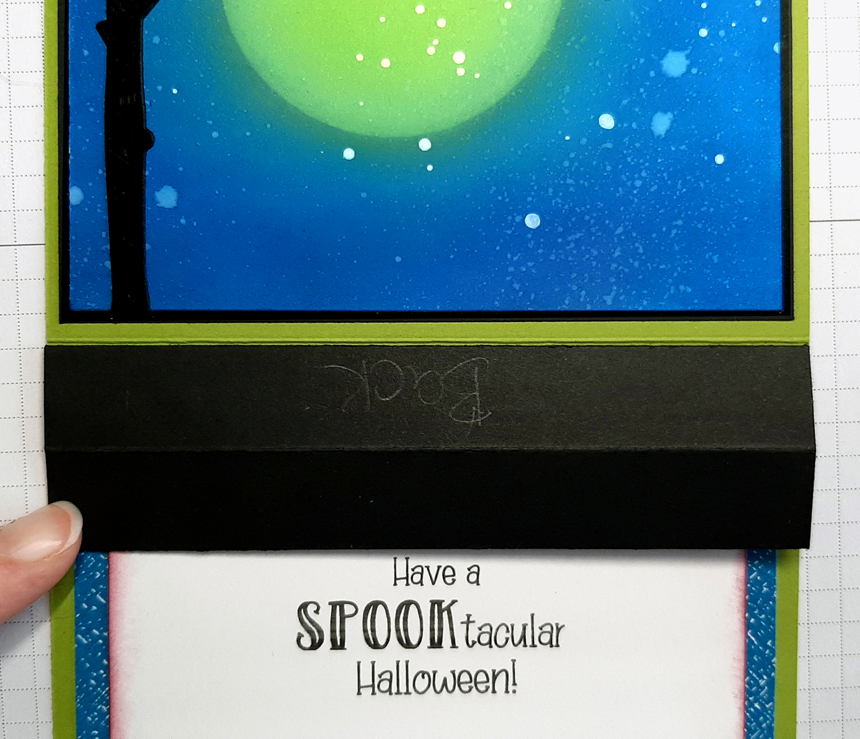
I created a smaller pop up box to stack on top right side of my longer box to help hold up the gravestone. I cut it to 3/4" x 2-1/2" and scored it at 1/2", 1", 1-1/2" and 2" then folded score lines and attached the ends. I glued it in place by pressing it up against the back (blue) part and down. Then I added the gravestone to it with glue.


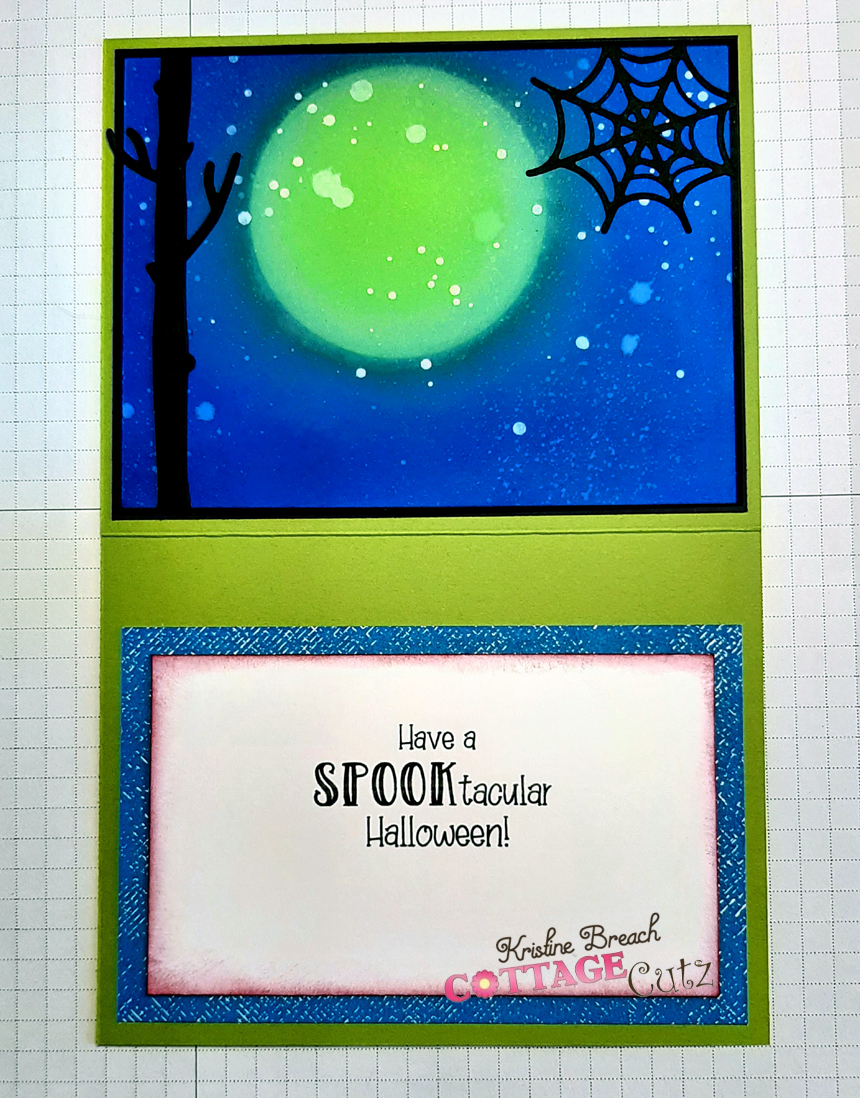
Here's the inside of my card...

And here's the front...

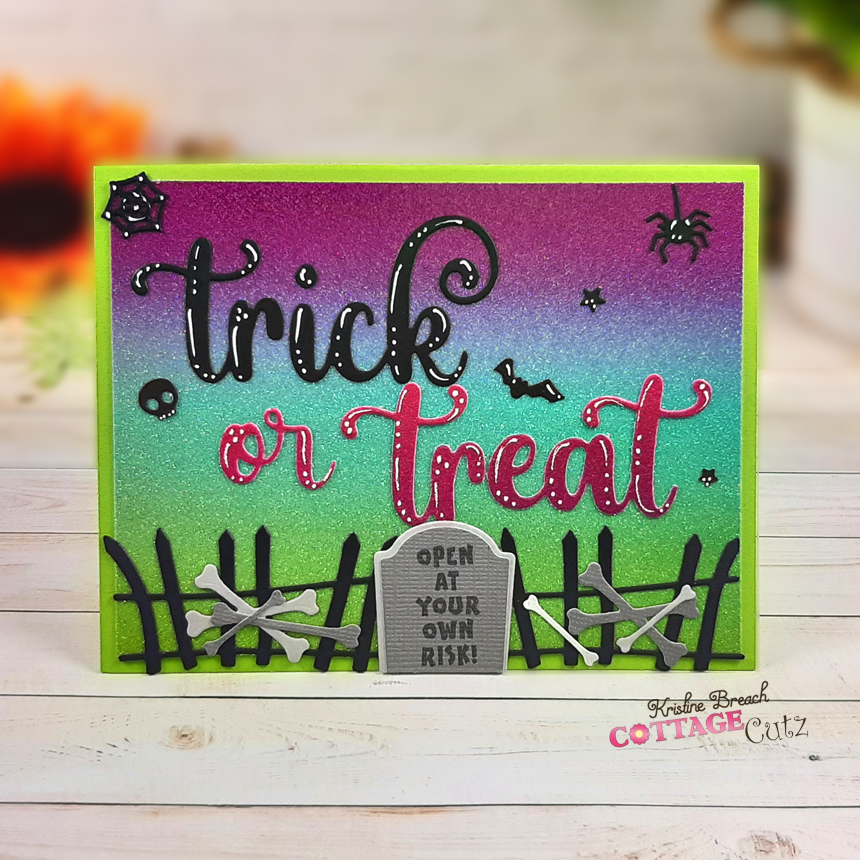
There are 21 dies in this release and they're currently on sale with a 50% discount on the entire bundle or 30% off individual dies for a limited time ~ so hurry over to the online store to make your selections!!
I used the Spooky Halloween Castle, the Spooky Kitties, Spooky Fence Mini, the Web and Graveyard for the inside of my card - and for the front, I also used Trick or Treat Phrase, and Spooky Truck (just the spider). As always, you can click on the pictures to see them larger. ☺
Design Steps:
I started with a piece of white cardstock cut at 5-1/8" x 3-7/8".
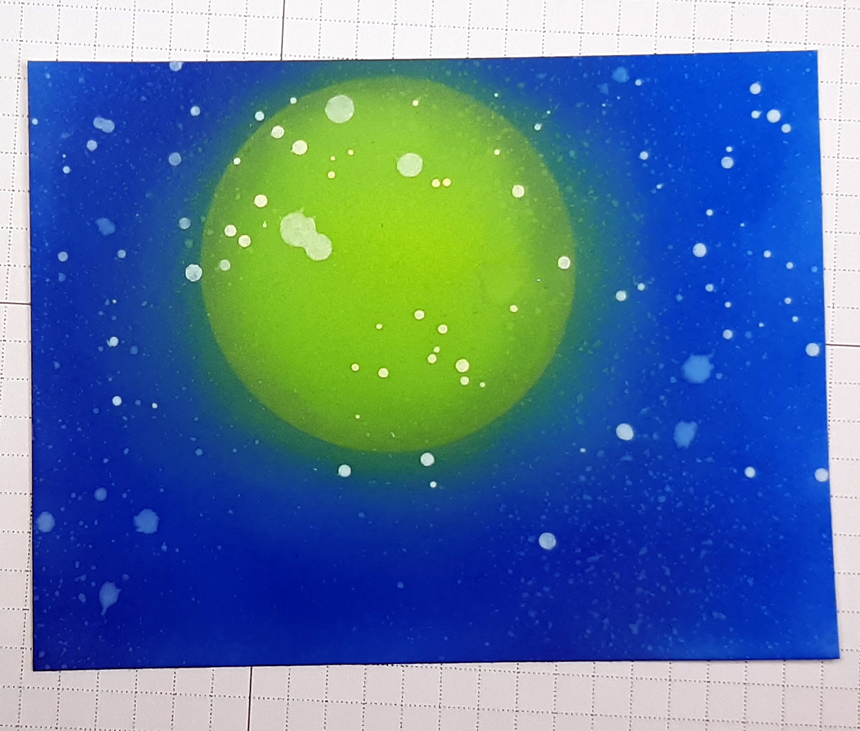
From a piece of scrap cardstock, I made a circle stencil by die cutting the 4th largest of the Pierced Circle set from the middle of my paper. I alternated the positive and negative cuts to sponge Distress Oxide inks to cover the cardstock piece. I then misted with water and let dry. Then I spattered white paint mixed with a li'l water on top and heat set it to dry.

I cut my card base from Granny Apple Green cardstock at 5-1/2" x 8-1/2," scored at 4-1/2"
I cut a piece of black cardstock at 5-1/4" x 4" and attached my inked piece on top, then attached to the inside upper half of my card.
I cut a piece of blue patterned paper at 5-1/4" x 3-1/4" and attached to the lower inside half of card. (see photo below for placement)
I computer-generated my sentiment onto white cardstock, then cut it to 4-3/4" x 2-3/4". I then sponged the edges with Rich Razzleberry ink and attached it to the blue patterned paper.
I then added my black silhouette tree (Birch Tree die from La-La Land Crafts) and web to the upper inside section before adding the mechanism as it will cover up part of the tree.

Now to make our POP UP feature!
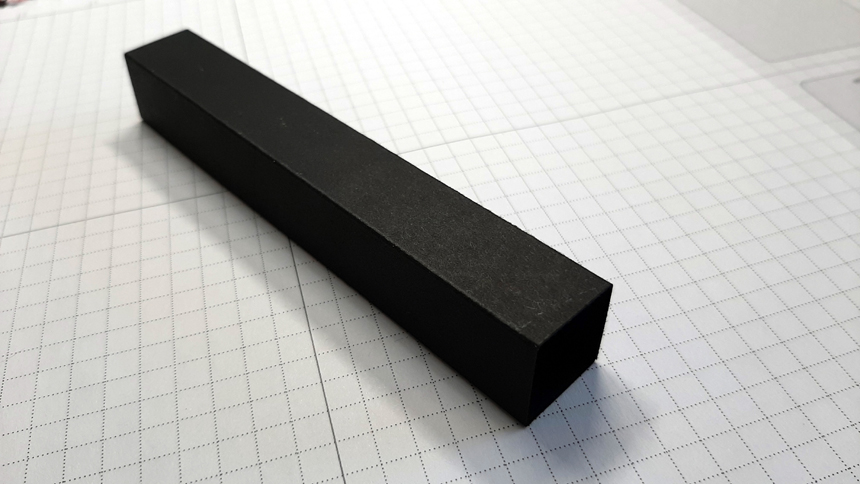
I cut a piece of black cardstock at 5-1/2" x 3-1/2" and scored it (with the short edge along top of score board) at 3/4", 1-1/2", 2-1/4", and 3". Then I added tape to the last 1/2" piece and attached the other end to it to make a long box!

To add it inside my card, I added tape to the bottom side of my box and laid it down so it's just up to the score line w/out going over it.
Next, I added tape to the adjacent side that will be attached to the "Back" - then I closed my card front down over it and pressed down. Easy Peasy!!


And then I added all my elements as pictured ☺

For the front, I cut a piece of rainbow glittered cardstock at 5-1/4" x 4". Then added my die cuts and made them pop a li'l with a white gel pen... and DONE!! ☺
COTTAGECUTZ PRODUCTS USED:
Check out the whole HALLOWEEN RELEASE HERE!
I hope I inspired you to get crafty with your favorite CotageCutz dies ~ Have a blessed week ☺
~Kristine