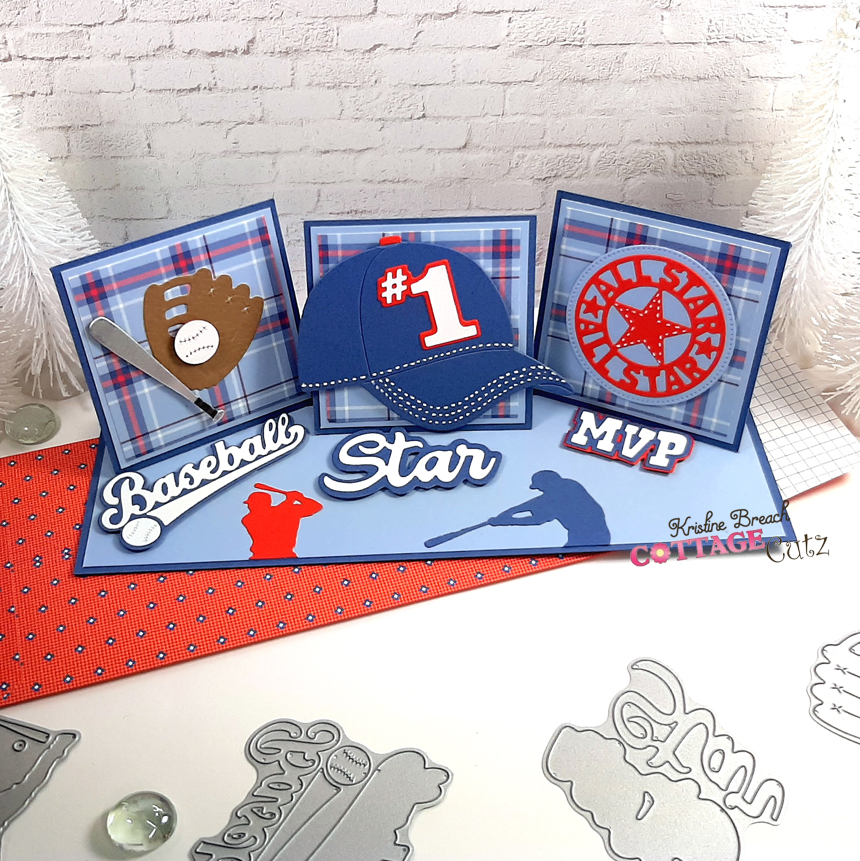
Happy Monday y'all! Today's card is another Triple Twisted Easel card using the new BASEBALL & GOLF RELEASE which is perfect for all the sports fans out there! PLUS... the individual dies from this release are currently 30% off!
And YES, it does fold flat to fit into a slimline envelope (which I will also show you how I made one)!
DESIGN STEPS:
I cut my card base out of SU! Misty Moonlight cardstock - 6" x 9" and scored along the 6" side at 3" to make a horizontal slimline card base.
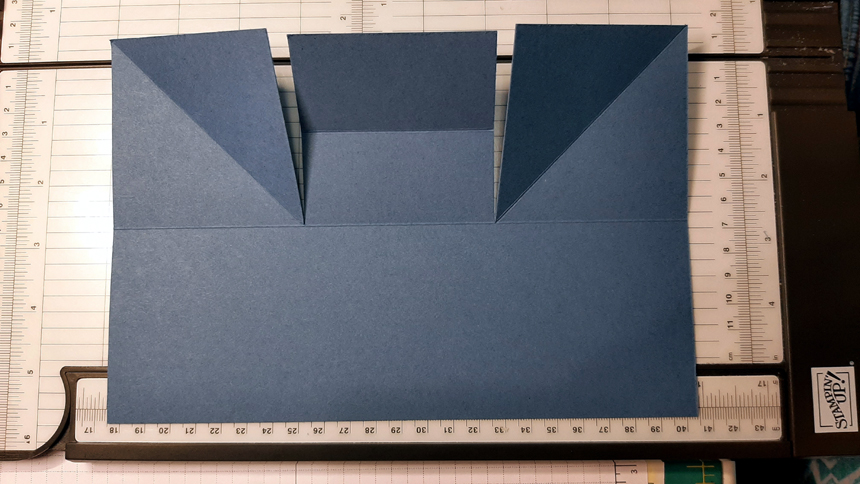
On the TOP half ... (see photo below):
- I cut down to the score line from 3" and again at 6" to make 3 equal parts.
- I scored the 2 end squares diagonally from the top outter corner down the the inside corner.
- I scored the middle square in half horizontally at 1-1/2"
I cut a piece of SU! Seaside Spray (light blue) at 8-3/4" x 2-3/4" and attached to the inside lower portion.
- From base card color, I cut (3) 3" squares.
- From the lighter blue, I cut (3) 2-3/4" squares
- From patterned paper, I cut (3) 2-5/8" squares
I added glue just to the lower scored sections as shown in the photo below:
...and attached my 3 squares, centering them onto the card front.
DIE CUTTING: I die cut all my pieces from the Baseball Cap, Baseball Glove, Bat and Ball,(the bat was cut from a silver metallic cardstock), All Star Emblem, Baseball Phrases, Baseball Phrase w/ Shadow, Baseball Batter & Silhouette, and then for the light blue circle behind the emblem, I used the 5th (from smallest) of the Pierced Circles set. (see photo below for color/piecing reference).
GLUING: I glued the All Star Emblem to the light blue circle die cut. I glued the glove directly to the left square. I glued the #1 to the cap, and I cut each of the batter silhouettes in half and glued them to the lower portion of inside card, aligning them with bottom edge (as shown).
POPPING UP: Everything else I popped onto the card using foam dots. The phrases serve as the easels to prop up the squares, so they "need" to be popped up.
The top squares lay flat to fit inside a slimline envelope!
Don't have a slimline envelope? Here's how I made one out of double-sided 12" paper: (the paper I used was an older SU! one - Best Suited? or something like that. I used the one that is red with blue diamonds on it, perfect for a baseball themed card!)
- I cut a piece of patterned paper to 8-1/2" x 12".
- With the 8-1/2" across the top of my score board, I scored at 2" and 6"
- I turned my paper so 12" is across the top of my score board, and scored at 1/2" and 10"
Next, I cut out the corner pieces (as shown below) and mitered the middle flaps (cut at an angle) and the 4 side flaps I angled ever-so-slightly.
*Optional: You may choose to round the corners of the largest flap. I used my envelope punch board.
Next, I used double sided tape to attach the narrower side over the wider side, and then the bottom flap up over the sides.
Here's the card going into the envelope...


