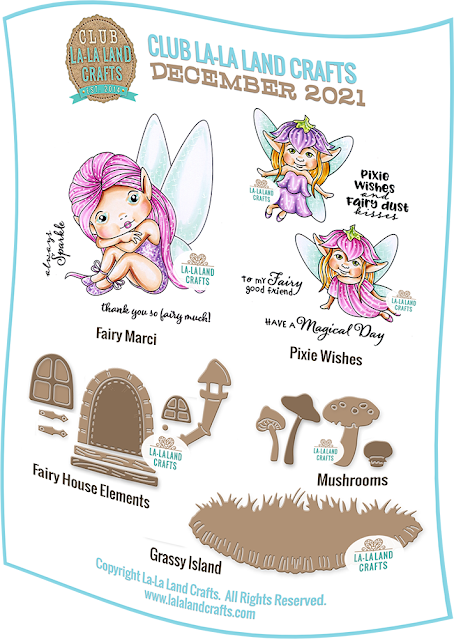
Hello! It's Club La-La Land Crafts Reveal Day #4 using December's Kit! This is my first of two posts today 😁 For this first one, I created an easy Shaker Card, and in my next post, you'll see my Double Slider Card with photo tutorial, which should be live by the time you finish reading this post.

ADDITIONAL LLLC PRODUCTS:
Clear Packaging from my stamp for the shaker!
COPIC COLORS:
SKIN: E00, 000, 13, 21, R00, 20, 21
HAIR: V12, 15, 04, RV66
PINKS: RV02, 04, 10
TEALS: BG10, 11, 15, 45
PURPLES: ('shrooms) BV11, 15, 17
DISTRESS OXIDE COLORS:
Picked Raspberry
Seedless Preserves
HOW I DID IT:
- I started by blending Distress Oxide inks onto a 5-1/4" square piece of white cardstock. Then I spray-misted water onto the upper part for a "twinkling" effect.
- Next I cut out a window using the largest Double Stitched Dome Die and saved the cut-out for the backing behind my shaker elements. Next, I attached double-sided Adhesive Sheet behind a piece of white cardstock and then I ran it thru my Spellbinder's Platinum 6 with the largest die from the Scalloped Dome Die set, followed by the largest Double Stitched Dome to make a frame for the front, then adhered it to the front.
- I added Tear n' Tape all around the dome cut out on the back side of card front. Then I cut a cello bag that my stamps come in to be a li'l larger than the cut-out and added some shaker elements to it. Then I taped the bag shut.
- Next I added some very thin foam tape all around the edges and a li'l closer to the shaker bag (so it wouldn't get too squished and not shake).
- I placed my pink cut-out (from step 2) behind the shaker bag so it matched up perfectly with the cut-out on the front and taped it down to my card base.
- Next I peeled off the backing to all my foam tape pieces and adhered the front to my card base.
- Lastly, I stamped, colored and cut out my images and sentiment and attached to front.
• Fairy Marci Rubber Stamp Set
• Pixie Wishes Rubber Stamp Set
• Fairy House Elements Die
• Grassy Patch Die
• Mushrooms Die
If you'd like to start receiving the monthly Club Kits starting with the January 2022 kit, CLICK HERE.
♥ ♥ ♥
*Note: This post may contain affiliate links at no cost to you.
Thank you so much for vising ...
Happy Inking!

