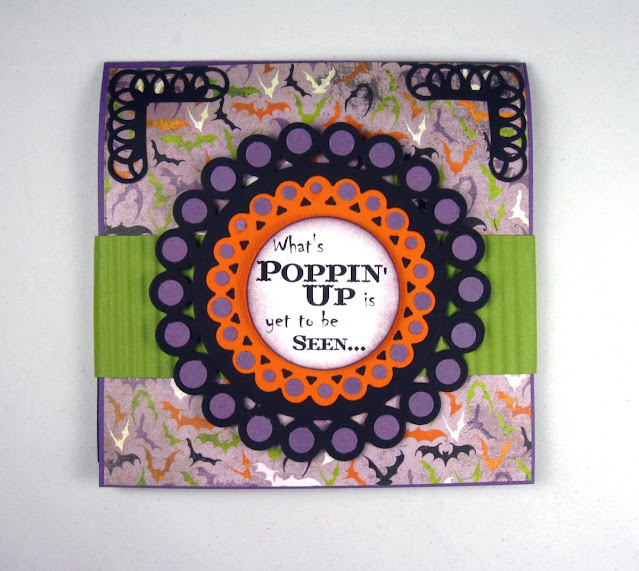
This collapsible Pop-Up Stage card is sure to delight your special someone this Halloween... and I'm going to show you how I did it!!
*Note: this is how I made my 5.5" square version... adapted from the original 5.25x4.25" found at Kim Score's Paper Punch Addiction
Supplies:
- Card base- 5.5" x 11" and folded in half at 5.5"
- Black cardstock for stage - 5.5" x 6.25"
- Black cardstock for tabs - 2" x 1/2"
- *Optional-- Clear acetate (or clear cardstock) - 2" x 1/2" if you don't want tabs to show
- Green cardstock for belly band - 12" x 1 3/4"
- BG Eerie Papers - 5 3/8" square (for inside top); 5 3/8" x 5.25" (to cover top of stage); and 3/4" x 5 3/8" (front bottom piece)
- Halloween images - Pumpkin Marci & Witch Marci. (http://www.lalalandcrafts.com/)
- Cherry Blossoms Die - Sizzix
- Fence Border Punch - Martha Stewart
- Exacto knife
- Strong Double-sided tape , like Tear 'n tape
- Crimper (*Optional for bellyband)
*NOTE: Before you begin, if you wish to add a piece of designer paper to the outside card front, now is a good time to do it as it may be harder once your inside gets thicker! ☺
Let's Begin!
1. Tape your 5 3/8" square piece of designer paper to the inside top of card.
2. Score your longest side of stage (6.25" side) at 1/2" on one end and then I flipped it over and scored 1/2" and 1" on the opposite end.
3. Score your stage designer piece at 1/2" on the short side and tape it to your stage, making sure you align the 1/2" score with the end 1" score end of stage.
4. Arrange your images on the stage, making sure that when laying flat that they don't stick outside of the top of stage (not counting the outer scored edges). Draw 1/2" lines at the bottom of images.
(You see one of my images is upside down. That's because that image will fold forward and the witch will fold backward when the card is closed.)
5. Use exacto knife to cut slits that are 1/2" long where you want the images to stand.
6. Score your 2" x 1/2" tabs at 1/2" on one end. You may use all colored cardstock for your tabs, however, I didn't want some of my tabs showing on some of my skinnier images so I used clear acetate for some.
7. Apply tape to each 1/2" outer scored end of your stage then tape the single scored edge to the card top, just above where your card base is scored.
It's easiest to attach the images the go in the front half of stage now...
**Important: For the ones in front that will fold backwards, you want to apply tape to the top side of the 1/2" scored end and insert tabs in the front slits so that they are facing forward and taped directly to the underside of the top layer of the stage.
Now, you want to attach the front of stage to the base of card. While holding your card top at a 90 degree angle, tape the other end (outer 1/2") under. (See pic below)
8. And now you can attach the tabs in the back half of stage. For these, you will add tape to the bottom of your 1/2" tab and insert the tabs so they are facing towards the back of card, and push them all the way down, attaching the tabs to the bottom of stage (which is actually your card base)
9. Attach your images to the front of your tabs.
10. Apply designer paper to the front card base and a sentiment if you wish and Ta-Da!
HOW IT FOLDS CLOSED & FINISHING THE OUTSIDE:
11. As you fold it closed, the back pieces will automatically be pushed forward. You might have to "help" the front pieces fold towards the back though (witch Marci & front fence, and the li'l black tree.)
12. You need your 12" x 1 3/4" strip (crimped or non) and any image you wish to add on top of band (*Optional)

13. Loosely wrap band around closed card. If you wrap too tightly, it will be very hard to slip it on and off.
14. Tape band ends together on back side of card.

15. Tape medallion (or other image) to the band
Voila!!
Sentiment: "What's Poppin' Up is yet to be seen..."
Inside: "Have a SPOOKtacular Halloween!"
Happy Creating!!! =)


