Many years ago, before we had kids, I had made my husband a birthday cake (1st cake I ever made).... and well, like they say, "A picture is worth 1,000 words"


Ya I know... it looked SOO bad! 😂😂😂 I didn't have "cake pans", but he didn't care, it was his favorite cake that his mom used to make him which was an orange poke cake with an orange flavored Jell-O poured down through the holes, and covered in an orange cream cheese frosting, and it TASTED yummy!
But, after we had our first child, and given how bad my first cake looked, I decided I'd better learn to decorate cakes for the many birthday parties to come, so I took a 6-week Wilton Cake Decorating course through the Michael's Craft store and I learned ALOT!
Of course I purchased some actual cake pans to start! She gave us tips on how to bake our cakes evenly and tips on stacking, leveling, and crumb-coating them. Then we brought our cake with us each week and learned to decorate them in class.
Here's my first cake from class. We learned how to take a coloringbook page, lay a piece of wax paper over it and traced the image with gel icing. Then carefully turned the wax paper over onto the cake and lightly rubbed the gel image onto the cake (sanitary! the coloringbook page never touches the cake) Then filled it in with star tip and more outlining with frosting.
another coloring book image cake


We also learned how to make Royal Frosting roses & other flowers!


We learned how to do various borders and even a basket weave!

We learned how to use fondant (don't like the taste, but is fun to work with)
This teddybear turned out much darker brown than I wanted but my daughter was super happy with her cake!

Alice in Wonderland Tea Party cake I made for my friend's daughter's party
I used fondant for cups, placemats and tablecloth and mini cupcakes.

and here are some Shaped Caked made with Wilton's shaped pans... not all of these were for my class... I made them specifically for my kids' & my friends' kids' birthdays over the years


and then I tried this circus cake for my youngest daughter's 2nd birthday!
The top is made with a doll dress shaped pan (the kind you stick the upper half of a doll into). The bottom is made by stacking 2 Flower shaped cakes on top of each other.

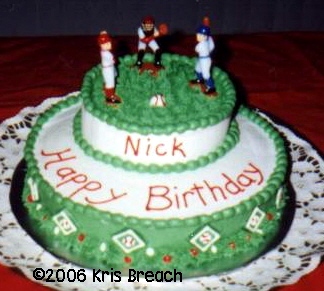
And for this next one (it's hard to see in this photo) but I used a grass tip for the top of cake and the border around the bottom.
We learned to use a cardboard circle and some dowel rods between different sized layers so the top cake doesn't sink into the bottom.

Unfortunately over the years I developed carpal tunnel in both my wrists and had to have 2 surgeries so I took a break from cake decorating. I then donated most of my cake decorating pans/tools to some missionaries who took them to a group of women in Ecuador so they can learn a trade and make money for their families. So my cake decorating adventure took a long break.
HOWEVER...
Since my daughter Carly has gone off to college, she has issued us a cake throwdown challenge when she comes home to visit, based on that Netflix show "Nailed It" She picked the theme, UNICORNS

and for our 2nd one... a MARVEL theme!
The pic (on the left) was our Pinterest Inspiration. We worked together to recreate it with very limited supplies (pic on right)
