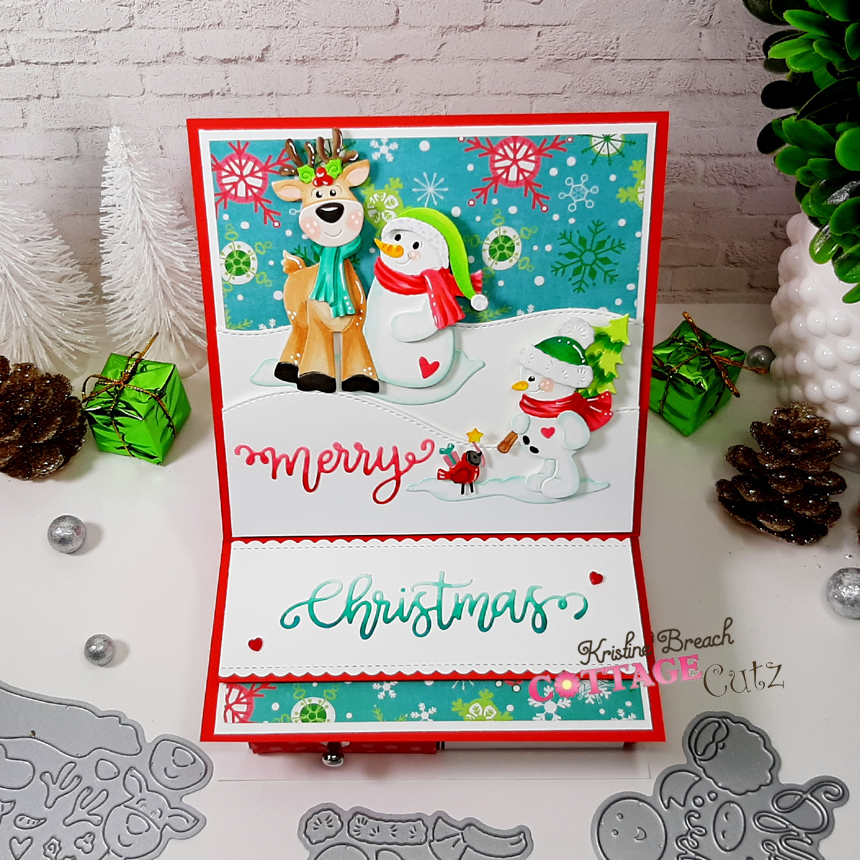
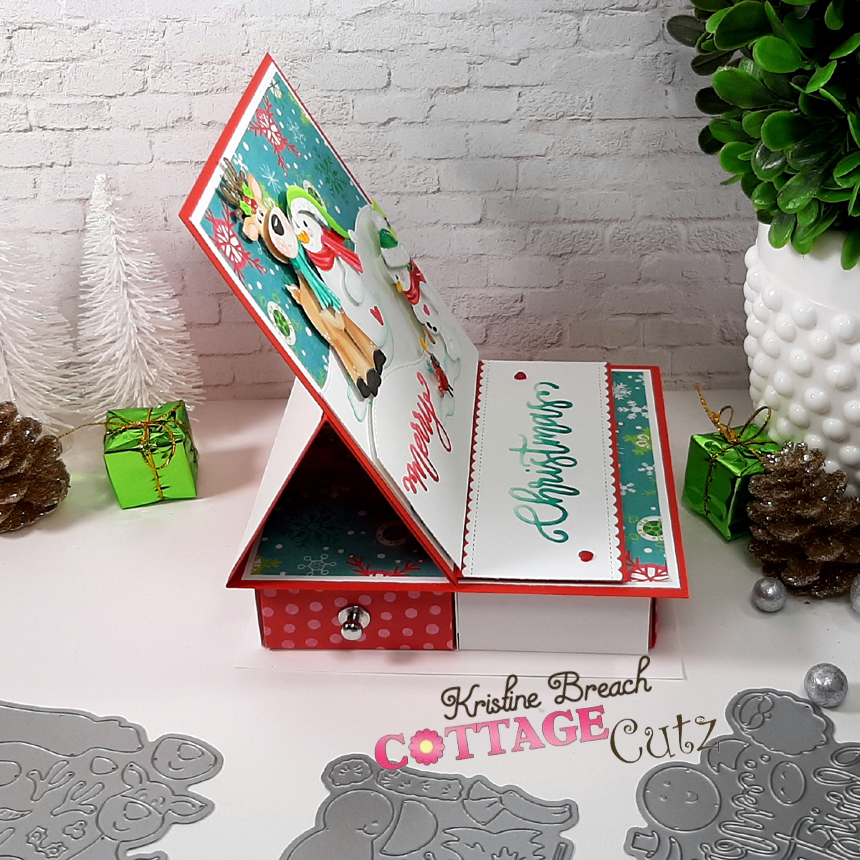
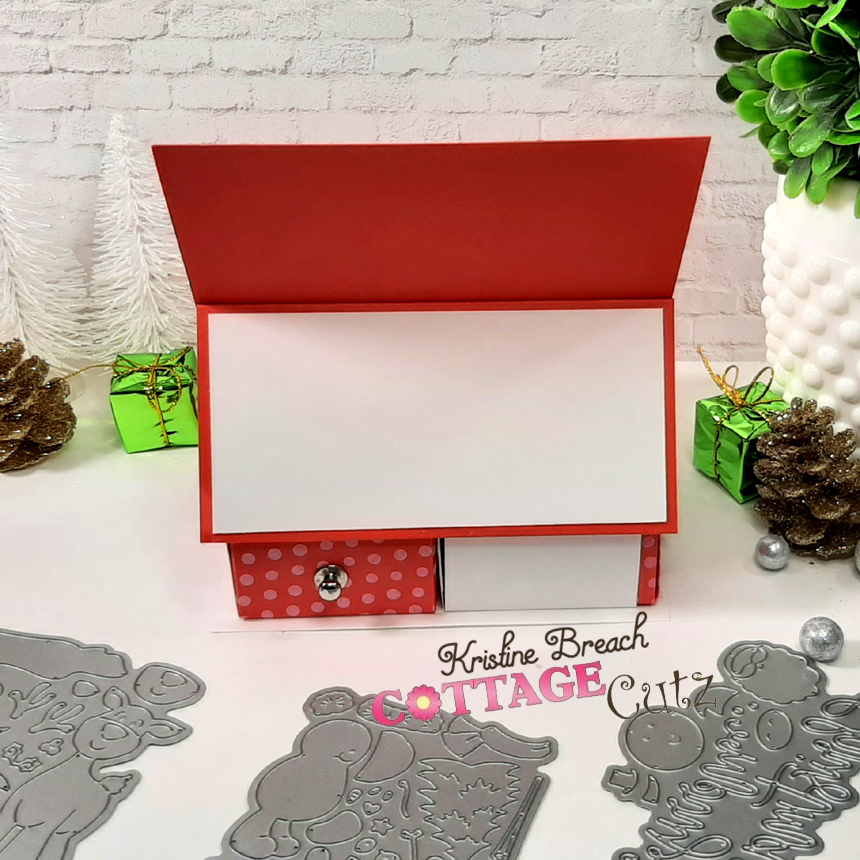
It's been a li'l while since I've made one of these 4-drawer easel cards so I thought I would make one using the New Christmas Release at The Scrapping Cottage! These are perfect for gifting li'l treasures or small wrapped candies etc! Although the top card folds down, the boxes underneath do not, so this is one of those gifts that's perfect for giving in person ... or displaying on your entryway table for your holiday guests!

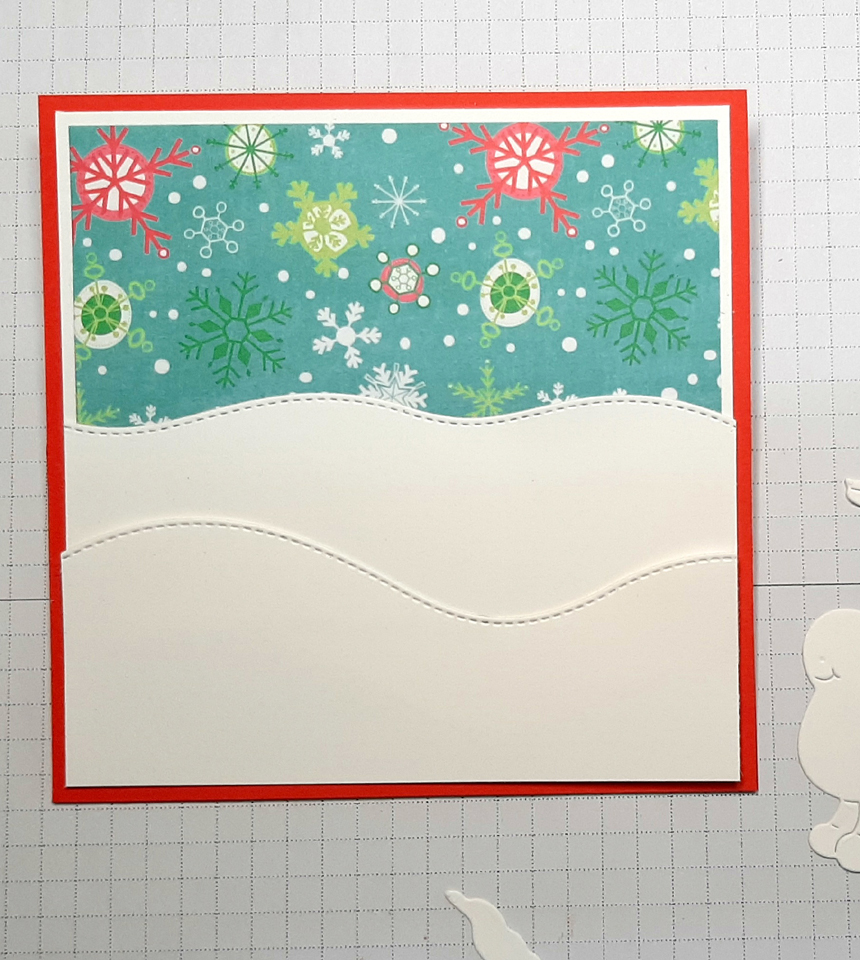
3. From one of my 4-3/4" white squares, I die cut 2 hills from the Hills Slimline set. I glued the highest one directly to the snowflake layer, and I popped the front one up with foam tape.
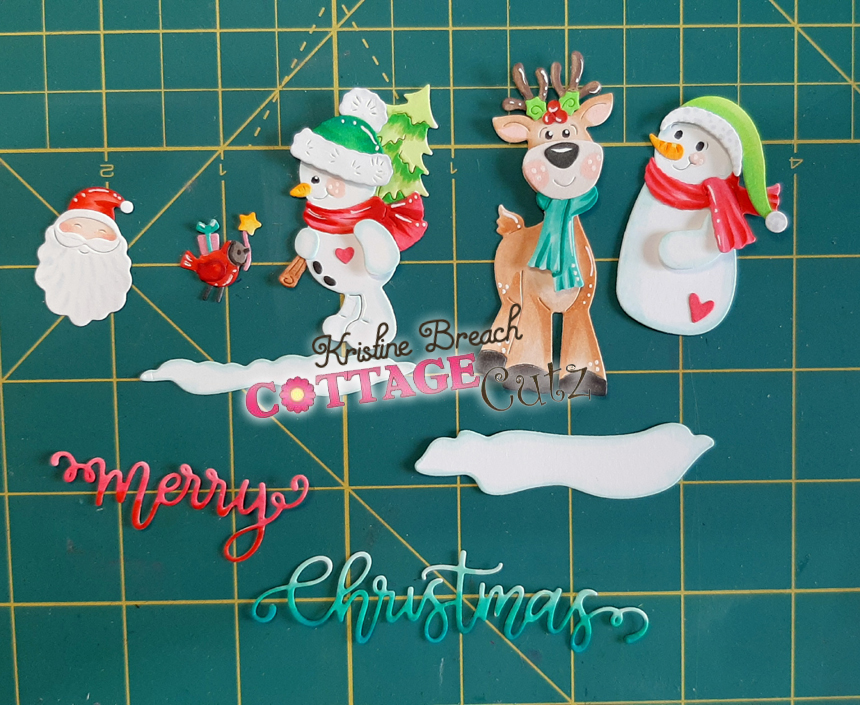
4. I die cut all my cute elements from the Snowman with Tree and the Happy Reindeer & Snowman as well as the Merry Christmas with friends. I colored them with Copics and pieced together. The reindeer's muzzle & scarf, and the snowmen's arms & hats are popped up with foam dots.


9. Fold all 4 corners up the center and keep them folded for the next step.
10. Fold one edge up to the center, unfold that edge before you go onto the next edge until you have all 4 edges folded as shown below.

11. Now unfold the TOP and BOTTOM sections all the way, and then fold the side sections up ash shown below.

13. Now fold that top triangle over the folded edge and press it down, creasing all folds.

14. Repeat on opposite edge.
16. Next, we need to punch holes in the front of our boxes (choose one of the thicker sides) and insert knobs! If you don't have these button studs you can get creative with pipe cleaner, stacking foam dots and adding a charm, brad or decorative pull, etc.

17. I used my Crop-o-dile to add the holes in the same spot on all 4 drawers.

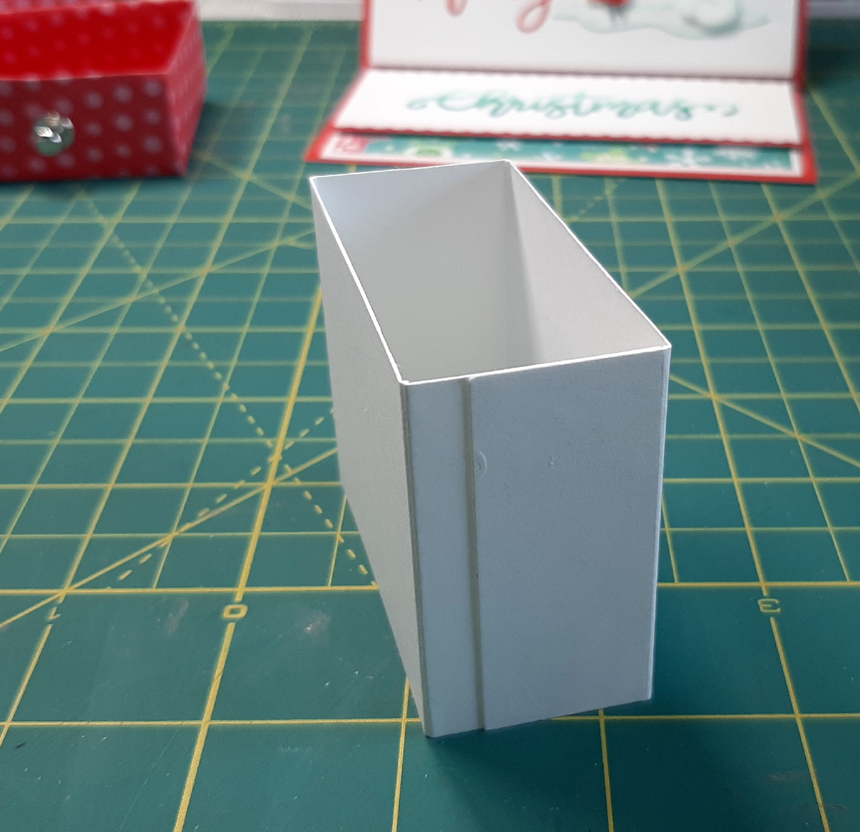
18. Now to make our drawers casings! Fold and burnish your (4) strips that are 7-5/8" x 2-1/8"

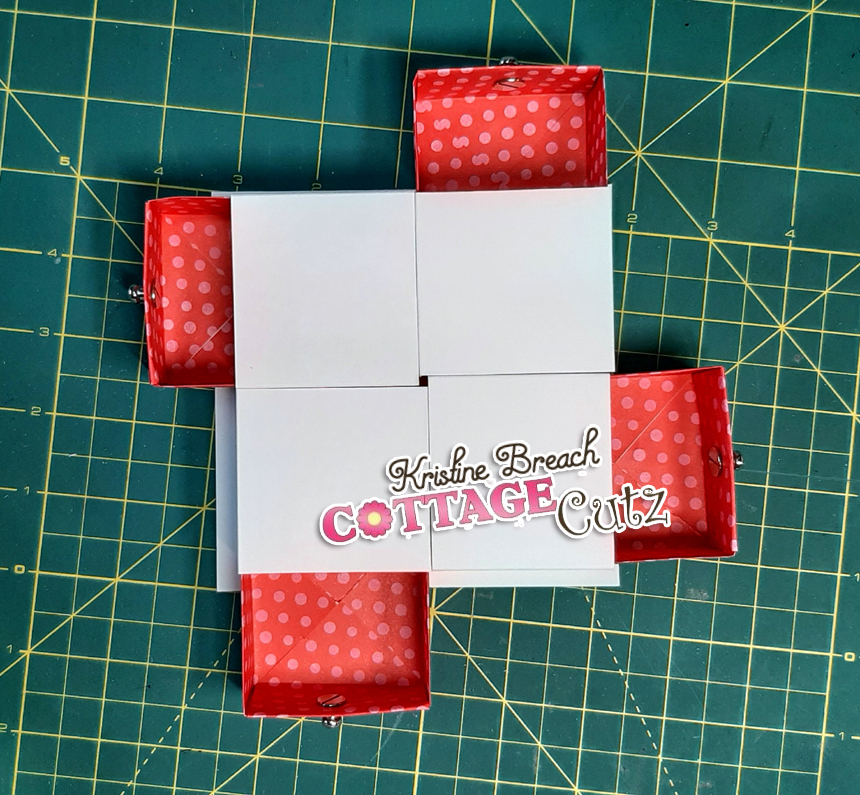
20. Now, before you start gluing, just place your casings onto the 5" square base so that ALL the seams are facing the inside, and so that you only have ONE open end along each edge. In the photo below, the left box is the open end of the casing, where we will slide a drawer into, but the one next to it on the right is the side of the next casing.

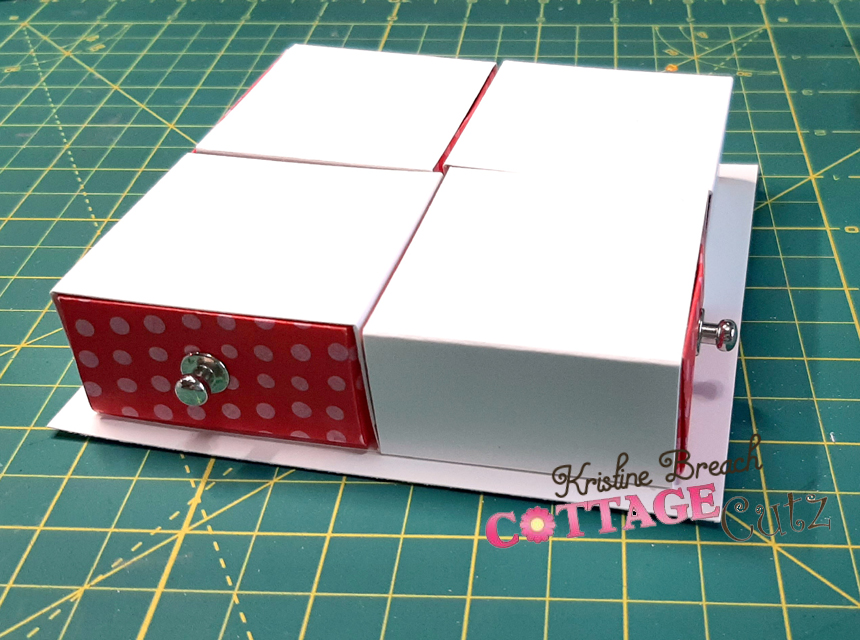
21. Insert your drawers!

24. Be sure to add some wrapped candies or li'l gifties inside your drawers! Christmas candy isn't out yet here, it's all Halloween, so I added some caramels to mine for now. They won't last long enough to gift this to someone, LOL!!!


I've used the new Snowman with Tree and the Happy Reindeer & Snowman today, but ALL the individual dies in this release are 30% off for a limited time!!


I created my own version of the 4-drawer easel back in 2010 by using a simple origami fold for the drawers and then I came up with the measurements for the drawer casings. You can of course just make 4 simple boxes from cardstock, but I think it's pretty to have them made inside and out from patterned paper - lightweight scrapbook paper is key! It's fun to go back to this project using NEW products from various companies through the years! Here is how I did it!
CUTTING & SCORING:
Red Cardstock
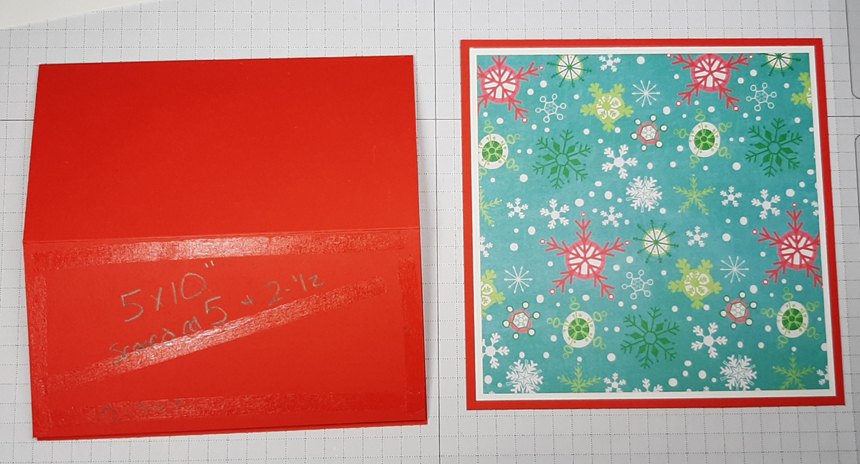
• Cut 5" x 10" and score at 5" and 2-1/2"
• 5" square
• 4-3/4" x 1-7/8"
White Cardstock
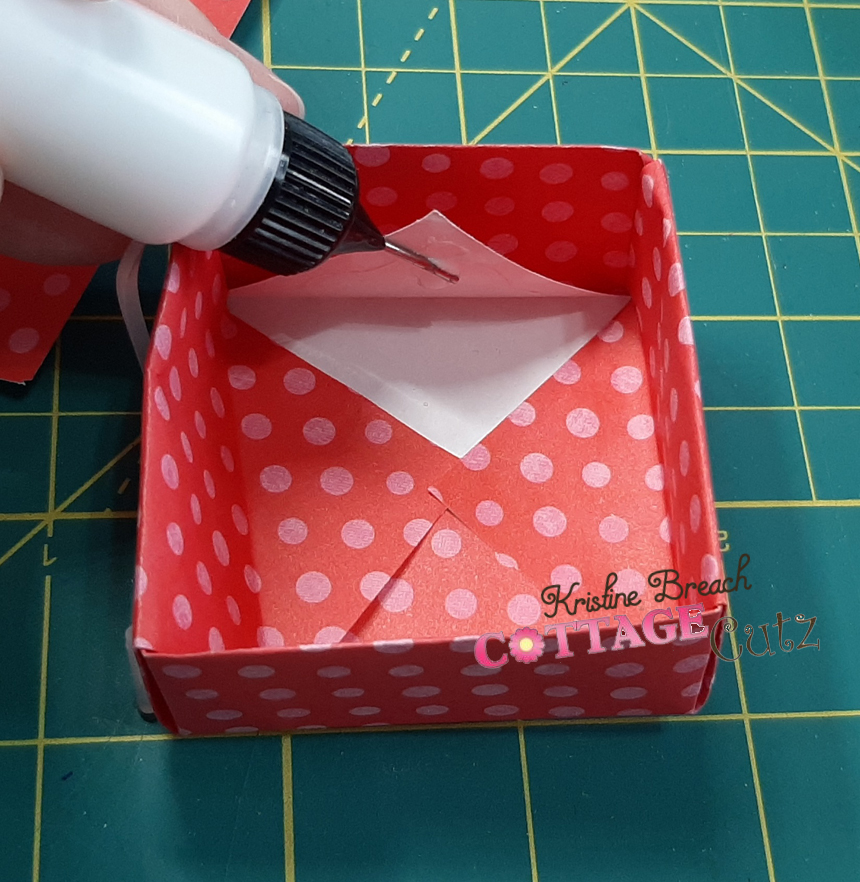
• (3) 4-3/4" squares
• 5" square
• 8-1/2" x 7-5/8"--- from that, cut (4) pcs. that are 7-5/8" x 2-1/8" and score each strip at 7/8”, 3 1/8”, 4 ¼”, and 6 ½”
• 4-3/4" x 2-1/4"
• Cut the smallest die from the Scalloped Stitched Rectangles Slimline (*optional)
Teal Snowflake Patterned Paper
• (2) 4-1/2" squares
Red/Pink Polka-Dot Paper
• (4) 6" squares
DESIGN STEPS:
1. I started by creating my easel card! I layered one of my snowflake papers to a white mat then onto the 5" red square.
2. I added tape to the lower half of my closed card front and attached my snowflake piece on top.


5. Once again, I attached my 2nd snowflake layer to my white mat (4-3/4" square) and then attached that to the INSIDE of my card.
6. I cut my white scalloped rectangle to a width of 4-3/4" and attached to my red mat (4-3/4" x 1-7/8"). I then added foam tape to pop it up so it will act as an easel and prop up my card front! (see photo below)
7. I glued the die-cut snow pieces & sentiments and everything else was attached with foam tape.

Now to make our drawers and base.... stick with me, I PROMISE this is easier than it looks! ☺
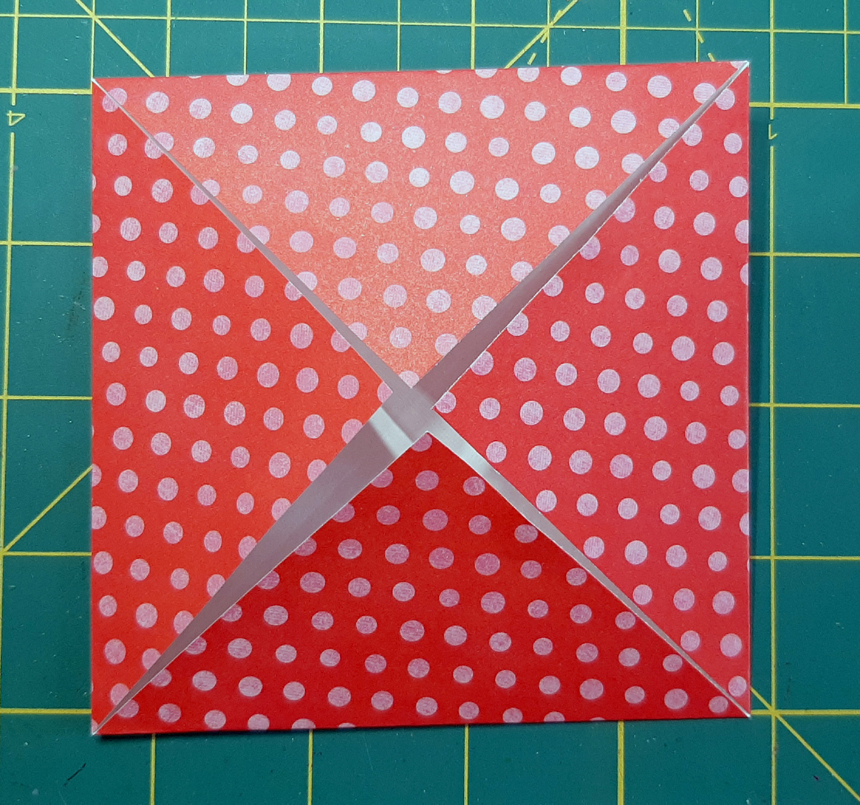
8. With one of your 6" square patterned papers, fold in half, then open it up and fold in half the other way as shown below.


12. Using your pointer fingers, press in on the top corners which will cause the top section to pop up.


15. *Optional: You can glue down the triangle flaps if you wish.


19. *Important!!! Glue the ends so that the SHORTER end is OVER (outside) the longer end as shown below.
*You will want your boxes to be touching each other, so you will have a small border around. Once you have them centered..... no seams are showing on the outside, and only ONE opening per edge.... Glue them down, one by one!


22. With drawers pushed all the way in, add glue to the whole top being careful not to get too close to the outer edges - you don't want seepage! ☺ Then attach your easel card to the top, centering it with the white base under the drawers.
23. Attach your 4-3/4" x 2-1/4" pc. of white cardstock to the back of your easel as shown below. This is a spot for you to write a personal message to your recipient. OR, you could write a note and put it in one of the drawers! ☺

Here are the Products I Used:
THANK YOU for taking time to visit today!
If you found this tutorial helpful, please leave me a comment! ☺
~Kristine
Happy INKing!