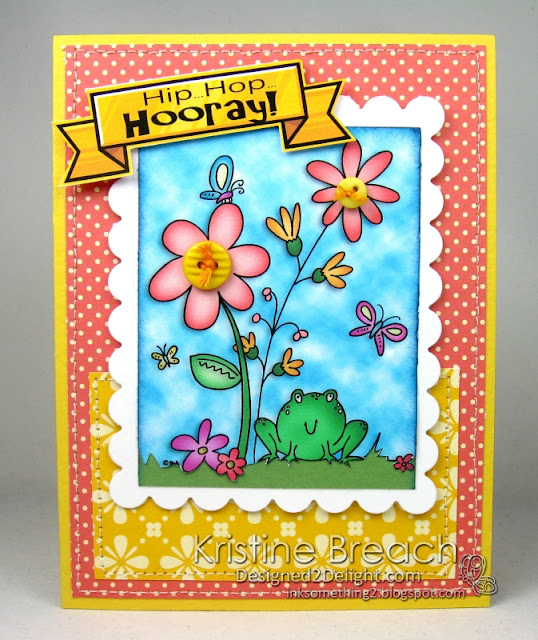
Hi I'm back with a tutorial for you. I was asked how I colored my D2D digi, Bullfrogs n' Butterflies using Photoshop, so I thought I'd create a tutorial. (you'll see it's kinda long, but I think pretty thorough for those who need to SEE how to do each step) *Ü*
I used PS 7.0 so it's an older version, however if your buttons look different, I'm sure you can figure out something similar.
Remember, you can click these pics to enlarge to full size.
TUTORIAL - How to color digis in Photoshop
**IMPORTANT**
This works for any images that have lines that are totally connected. Some digis have disconnected lines for the outline and that takes an extra step or two. I will try to cover those in another tutorial later on. So be sure to pick a digi in .PNG FORMAT with solid, connected lines such as this Bullfrogs n’ Butterflies set from D2D!
1) Open your digi in Photoshop
2) Right click on the only layer* there “Layer 0” and you can rename the layer if you’d like to “ORIGINAL” – this will help you later on as you add more layers
*If you don’t see a box with a “LAYERS” tab, then go to the tab bar (under the blue bar at top) that says “window” and click on “LAYERS”.
3) Right-Click on “Original” Layer and click “DUPLICATE LAYER”
4) Rename that layer “FROG” and click “OK”
(in the future, you’ll rename each layer according to what you’re coloring; ie. flower, butterflies, etc.)
5) On the “TOOLS” bar, click the magic wand icon, then click on the frog
6) When you see running dots/lines around the frog, (or other) and know it’s selected, then click on the PAINT BUCKET icon.
7) Make sure you have the color you want (as shown in green square below) – to change this, just click on it and select the color you want.
8) Click inside the frog with the paint bucket
9) Go up to “SELECT” and say “deselect” - Make sure you are on your FROG layer!
10) Click on LAYER / LAYER STYLE / INNER GLOW
11) In the middle of that box, check the Source to “CENTER” instead of edge and then move the SIZE slider to the right until you get it how you want. (make sure to drag your box on the screen so it’s not covering your frog. You want to see what’s going on as you move the slider)
NOTE: the mouth and other frog elements might look faded. That is OK! When we are done, we will have that “ORIGINAL” outline layer that we will move on top to add the black lines back on top of our colored version. =)
12) With that same window open, check the box that says “INNER SHADOW”
13) change the color to a darker green (see arrow below) and move the SIZE slider to the right until you get a good shadow on your frog.
14) Now on your LAYERS box, drag the ORIGINAL layer up above your FROG layer. You should see the black outline on top of your frog again!
15) Right-click on the “ORIGINAL” layer and click on “DUPLICATE LAYER”. Rename that layer “FLOWERS” (or other)
16) to color the flowers, repeat steps 5 – 13, except changing colors to floral colors, etc.
NOTE: you can switch back and forth between the magic wand to select your petals and the paint bucket to fill in the color, and back to the wand etc. until all your flowers are colored (on the same layer). HOWEVER… remember that everything you color on the SAME LAYER will have the same effect applied to it.
I colored all my pink flowers on one layer, and then started a new layer for my orange smaller flowers because I wanted to give them a different color “INNER SHADOW” than the pink.
**EACH LAYER YOU WANT TO GIVE ITS OWN EFFECTS, MAKE SURE YOU GO TO YOUR “ORIGINAL LAYER” and Right-click it to DUPLICATE LAYER and give it a new name. (ie. small flowers, petals, butterflies, etc.)
17) When you get all your elements colored, then be sure to drag your ORIGINAL LAYER to the top (above all your other layers) so that you have nice black outlines on top of all the color.
18) To add a background color (sky), right-click on your ORIGINAL layer again and DUPLICATE that and call it “SKY” or BG or whatever.
19) Click on the MAGIC WAND and then click somewhere in the open space (background) – it will show that it’s selected by some running dashes or other
20) Click then PAINT BUCKET icon and then make sure you have the color selected to a light blue
21) At the top, click on FILTER / RENDER / CLOUDS
22) at top, SELECT / DESELECT
23) Drag your “ORIGINAL” Layer up to the top again, so you have nice crisp black outlines again.
That’s it! =) CONGRATULATIONS!!
If you have any questions please ask away! I don’t claim to know everything about coloring in PS, but this works for me. Hope you had as much fun as I did in coloring with Photoshop!!


